Please share your success in the comments as we love hearing from you and today we will expand your knowledge on useful tools to have while practicing to improve your game even more.
We will talk about convenience and safety, but mostly about the safety of others as a result of your hits.
So what’s the golf netting for?
What Is the Purpose of Netting for Golfing?
Okay so, golf netting is probably one of the greatest inventions humankind has ever come up with. And we are not even exaggerating (okay, we are a little).
But either way, a safety net can be very useful whether you are practicing your skills indoors or trying to reach perfection outdoors. Here are 3 general reasons why professional and amateur golf clubs install safety nets:
- Safety – according to The Rules of Golf, Appendix III, on average, a golf ball has to weigh 1.62 ounces. Not so much, you would think. However, hit it hard and up a few tens of feet and it emerges into a dangerous hazard for public safety. Therefore, golf courses in urban and congested communities as well as in quiet neighborhoods prefer to raise their net walls up in the air (about 40 feet high, on average) in order to keep the golf balls within the golf course as a result of unsuccessful hits. Safety, as always, comes first. Besides, history has it there were a couple of lawsuits over golf ball injuries in the United States already. We will review all that later.
- Convenience – once again, those mighty-looking golfing nets are raised up high in order to keep the balls within the golf course territory, away from the edge of public disturbance. However, along with safety, they are also utilized for convenience. If you hit the ball the wrong way, or the wind or any other force swings it into unchartered territory, going and looking for that ball is usually a pain in the… you know where. Not to mention, depending on the manufacturer, those simple-looking balls are in reality not the cheapest thing to own. Generally, golf balls are sold for anywhere between $15 and $50 for a dozen. A dozen! Ask yourself: how many of those balls have you lost when you are practicing? That’s what we thought. In the United States, for 50 bucks you can put a full tank of gas in your SUV nowadays if you didn’t know (off-topic, pardon our manners).
2011 Lawsuit over Golf Balls: Really?
Anyhow, back to that lawsuit story, before we move forward. Long story short: back in 2011 Mr. and Mrs. Brady decided to buy a nice little house along the 18th hole of Hamilton Golf Course in Hamilton, the great state of Montana where nothing ever happens, and were a little upset about hundreds of golf balls landing in their yard every season.
The couple decided to sue both the golf course and the county government bringing charges of trespassing (what?), nuisance, and breach of duty.
In the end, the judge sided with the county and the golf course, and the golf course was not mandated to pay a settlement or construct a golf netting fence.
The whole process was a waste of time and government money in order to resolve a suit, as well as the stress associated with it. It’s is simply a huge inconvenience worth avoiding in the first place. And many, many golf courses and clubs know it.
Golf Netting: Too Simple You Can Make It Yourself?
Creating a golf net for the indoors or a net cage for your backyard for you and your kids to practice is no rocket science.
And this regular guy proves the point.
He made a golf net for his living room himself spending just a little over $100 for the whole project which was mainly the frame he got from the hardware store and the net itself. Check his video out:
The great thing is, it is easy to make the golf net yourself.
For one hundred dollars or maybe two tops, you can build a custom golf netting for your house or your yard and you can practice your shots at any time without fear to break your neighbor’s windows, damage their car, or maybe even become annoying bother aiming your shots into neighbor’s backyard, like what happened with that Montana couple we told you about earlier.
Regardless of how hard you hit the ball, the force will be canceled out by the stiffness of the net and it will just fall on the ground shortly after impact.
The beauty of it is, it will not bounce back at you or any other direction.
Guide: Homemade Golf Netting in 4 Easy Steps
Here is a list of the things you will need to perform those 4 steps successfully and start making your perfect game more perfect. This really is a good DIY project.
Minimum Checklist: a Set of 5 Items

- Two solid pole-like objects, 12 ft tall. We suggest either a metal post or a hardwood beam.
- One digging tool. You could use a regular narrow shovel. Or U.S. military-issued entrenching tool, or e-tool, will be perfect.
- One piece of 10-by-10 feet heavy-duty net. Can be either polyester or nylon. We recommend polyester if you hit pretty strong.
- One roll of nylon rope.
- Five metal, wooden or thick plastic steaks.
You can easily get all this good stuff from your nearby Home Depot, Lowe’s, or Walmart. And if you really like making things yourself, you can even make your own poles and steaks out of wood.
Cut down a tree nearby if you live in a rural area. But we strongly encourage you to check with local authorities if it is legal.
Now, here is what we are going to do.
Step 1: Go Deep
For those poles to withstand the force that will be applied to the golf netting after each impact, they need to stand strong on the ground.
Well, on the ground. Use the digging tool of your choice to dig out two 1-foot holes in the ground, but be sure to not exceed 2 feet in depth, approximately 8.5-9 feet apart.
Make sure you do not exceed the distance of 9.5 feet apart – that is how long your net is.
Step 2: Insert
Stick the poles in their respective holes and fill the remaining room back with the dirt to keep the poles standing firm and stable. Try to make sure the angle between the axis of the pole and the ground level is close to 90 degrees.
Step 3: Connect
Once the poles are in place, connect each side of the net to the poles with the help of a nylon rope.
Be generous and use that rope as much as possible tying tight knots about every other inch to prevent the occurrence of holes on sides. Thus, you should have approximately 10-12 securing knots on either side.
Also, it is important to make the net secured, but a little loose, so the freely moving slack can absorb the impact force and cancel it out instead of bouncing the ball back at you.

Step 4: Anchor
The bottom of the net needs to be secured with those 5 steaks approximately 2 feet apart.
This will help prevent the holes on the bottom.
Connect the net to the steaks with the help of the same nylon rope.
This ground anchoring will both help catch the balls better and prevent the netting from getting destroyed by inclement weather.
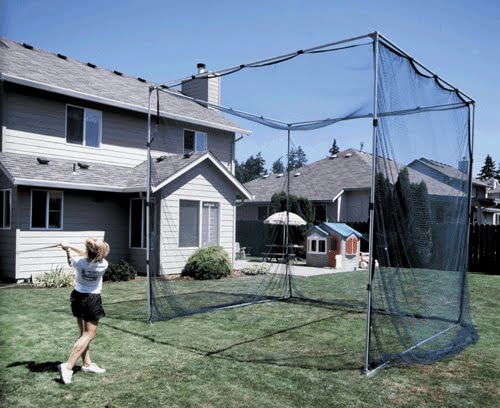
So your end product should like something like this when you are finished.
The picture illustrates the cage-type net though, so basically do those 4 steps again on either side of your initial net.
Pretty easy, right? Now picture all the steps in your head one more time and read this:
“Yes, we can!”
(c) President Barack Obama, Obama-Biden presidential campaign, 2008
Hell yes, you can! This is an easy way to create your own easy net. You can always upgrade it however you like, for example, by adding side golf netting if you are that bad. Just kidding.
However, on that note, cage-type nets are good for kids who are only starting to play.
Commercial Solutions – What Are My Options?
If you just want to place an order and have your net manufactured, delivered, and installed for you, there are a gazillion authoritative companies out there who specialize precisely in golf netting.
For a reasonable price, they will create custom nets for your home or business. You can choose between numerous materials and colors as well as customize the shape and structure of the frame.
Another option is to simply look to buy some ready and already assembled nets. If we were to look for something simple for a home to practice golf without leaving the driveway, this would have been our first choice.
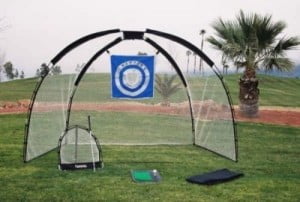
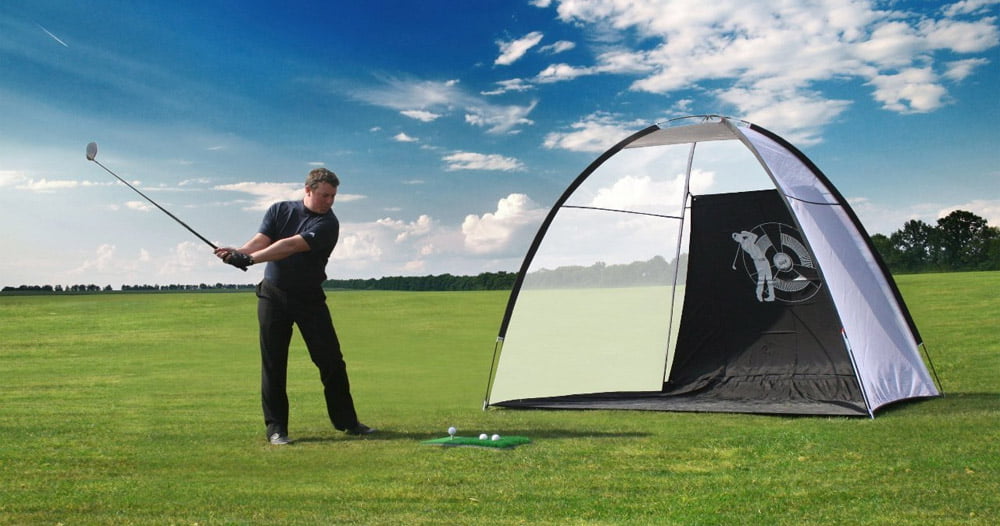
3 in 1 Golf Practice Set: Mat DrivingNet, Chipping Net, and Bag

The main one’s dimensions are 11W*7H*5.5D. All measurements are in feet.
It features a great ability to withstand the roughest weather as well as the flexibility to be broken down and easy transport in a nylon bag.
The total weight is only 13 pounds which include all of the items.
Easy to use, transport, store in the car or at home, and easy to install. Whether inside or outside.
Thanks for reading! Hope this article was helpful and let us know if you have any questions in the comment below.
